The joystick and OLED display are used to configure the receiver. Enter the menu by pressing the joystick. Several tabs are shown:
AUTO SEARCH
Here the receiver automatically scans the band and selects the strongest channel. With the joystick we can change the direction of scanning by moving it to the right or left.
BAND SKANER
Here we can see which frequencies are occupied, the higher the bars line up the stronger the signal on a given frequency.
MANUAL MODE
Manually searching for a channel, moving the joystick to the right or left changes the frequency to a lower or higher one.
DIVERSITY
In this tab we can choose whether our receiver will automatically switch the head to the one with the better signal, or we can manually select which head we want to use. In addition, we have visualization of the signal quality from each receiver.
SETUP MENU
ORDER: FREQUENCY / CHANEL - here you can choose whether the receiver should search by frequency or by channel.
If, for example, we select FREQUANCY and search for our frequency in manual mode by moving the joystick right or left, the receiver will switch up or down sequentially through the frequencies.
BEEPS: ON/OFF if you equip the receiver with a 5V buzzer, you can turn the sound indication of the receiver's operation on or off.
SIGN: here we can enter our nickname for ourselves (any name).
CALIBRATE RSSI: here we calibrate the rssi of the heads that the receiver is equipped with. It's best to turn on only one transmitter for a given frequency, move about 20-30 meters away and do the calibration. Calibration should be done in an open area.
SAVE & EXIT: Click here after each parameter change if you want the changes to be saved.
PIN DESCRIPTION

2S-3S - connector for connecting the package
GND - minus power, audio/video ground
5V - receiver power supply from beca 5V
* - free pin
SDA - additional display connector
SCL - additional display connector
VCC - same as the connector 5V
GND - minus power, audio/video ground
VIDEO - video signal output from the receiver
GUI - output on which we can get the same information as on the integrated OLED display in the form of a video signal, that is, we connect to an additional input in the goggles or monitor and we have all the parameters (the function is activated by modifying the program code)
AUDIO - audio output from video transmitter or camera
GND - minus power, audio/video ground


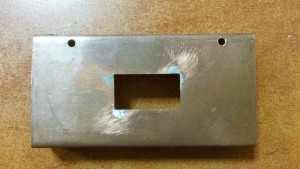
RECEIVER HOUSING
I decided to protect the receiver from damage by making an enclosure. I found a piece of copper sheet at the model shop and that's what the housing was made of.


In the last picture you can see the added linear stabilizer at 5V. You can also use a 5V BEC, as the factory-installed stabilizer is too weak and may be damaged. If we supply the board with 5V there is no need to add a stabilizer or beca, we use them only if we want to supply the receiver with more than 5V.
Receiver ready for operation.

Diversity FPV receiver RX5805 is available at abc-rc store.pl - Click here to go to the product sheet